Extracurricular Attendance
Recording student attendance is your most important routine task as a Coach at every meeting. Disciplined attendance recording is crucial because this data will directly affect student activity reports that can be viewed by parents through the mobile application.
[!IMPORTANT] As a Coach, you are required to fill in the attendance as soon as the meeting ends. Attendance is valid physical evidence of activity and becomes the main material for evaluating student affairs programs at the end of the semester.
Preparation Before Filling Attendance
For the system to display the student list correctly, ensure the following two things have been met:
- Member Approval: Ensure you have given Approved status in the Members menu. Students who are still in Pending status will not appear on the attendance sheet.
- Registered Schedule: Ensure the activity already has a routine schedule in the Schedule menu.
Steps to Fill Attendance
Follow this procedure at each extracurricular activity meeting:
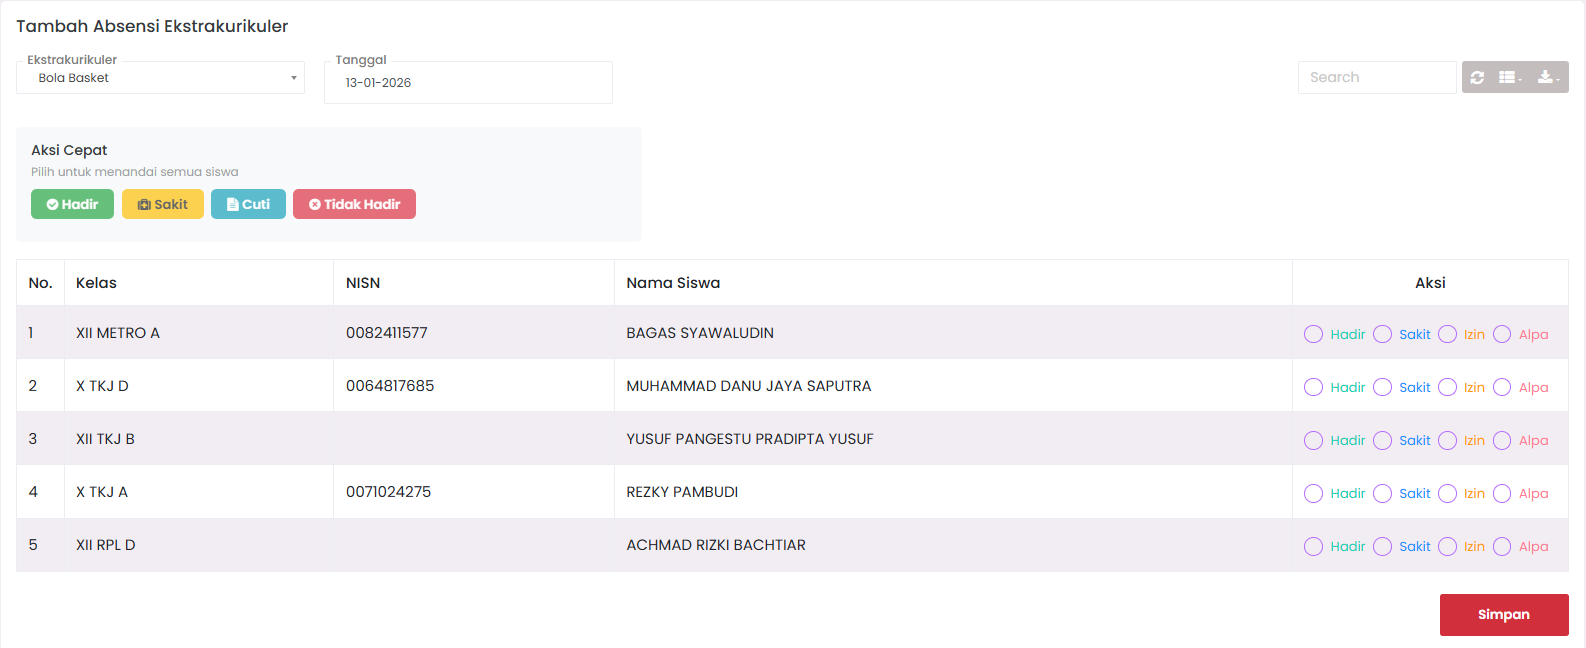
1. Selecting a Meeting Session
- Navigate to the Student Affairs → Extracurricular → Input Attendance menu.
- Select Extracurricular: Select the activity that has just been carried out from the dropdown. (Only activities you lead will appear).
- Select Date: Click on the calendar to determine the practice date. By default, the system will point to today's date.
2. Loading the Student List
- Click the Load Data or Show Students button.
- The system will display a table containing a list of all students who have become official members.
3. Giving Attendance Status
In the Action column, you can determine the attendance status of each student using radio buttons. There are 4 main status options:
| Option | Explanation |
|---|---|
| Present | The student followed the activity in full from beginning to end. |
| Sick | The student was unable to attend for health reasons (there is evidence/notification). |
| Permission | The student was unable to attend for a valid/official reason. |
| Absent | The student did not attend without any information at all. |
Quick Action Feature ⚡
To speed up your work if the majority of students are present, use the Quick Action button above the table. This feature will automatically mark all students in the list:
- 🟢 Present: Marks all students as Present at once.
- 🟡 Sick: Marks all students as Sick at once.
- 🔵 Permission: Marks all students as Permission at once.
- 🔴 Absent: Marks all students as Absent at once.
[!TIP] Fastest Way: Click the "Present" button on Quick Action, then manually change it only for the few students who did not come.
4. Saving Data
- Once all statuses are filled in correctly, scroll to the bottom of the page.
- Click the Save button (red diskette icon).
- Wait until the "Successfully saved" notification appears. The data is now permanently stored on the cloud server.
Best Practices for Coaches
- ✅ Real-time Input: Fill in attendance maximum 1x24 hours after the activity. Postponing input risks causing data errors due to forgetfulness.
- ✅ Supporting Documentation: Always take a photo of the activity or manual attendance list as backup evidence if at any time there is an attendance dispute with parents.
- ✅ Communication: If there is a student who is absent more than 3 times in a row without information, immediately coordinate with that student's Class Teacher.
Troubleshooting
-
Specific Student Does Not Appear in Table? Check their registration status again in the Member List menu. Most likely the student is still in Pending status.
-
Save Button Does Not Appear? Ensure you have pressed the "Load Data" button first. If the student table has not appeared, the save button will usually be hidden.
-
"Date Does Not Match Schedule" Warning? This is a warning if you input attendance outside the day you have determined in the schedule menu. You can still save this data, but ensure that the date is indeed an additional/replacement practice session.