Create Schedule
After successfully creating an exam in the Offline Exams menu, the next step is to schedule the exam implementation. This scheduling process is important so that the implementation time, subjects, and exam assessment criteria can be set appropriately.
Exam Scheduling Steps
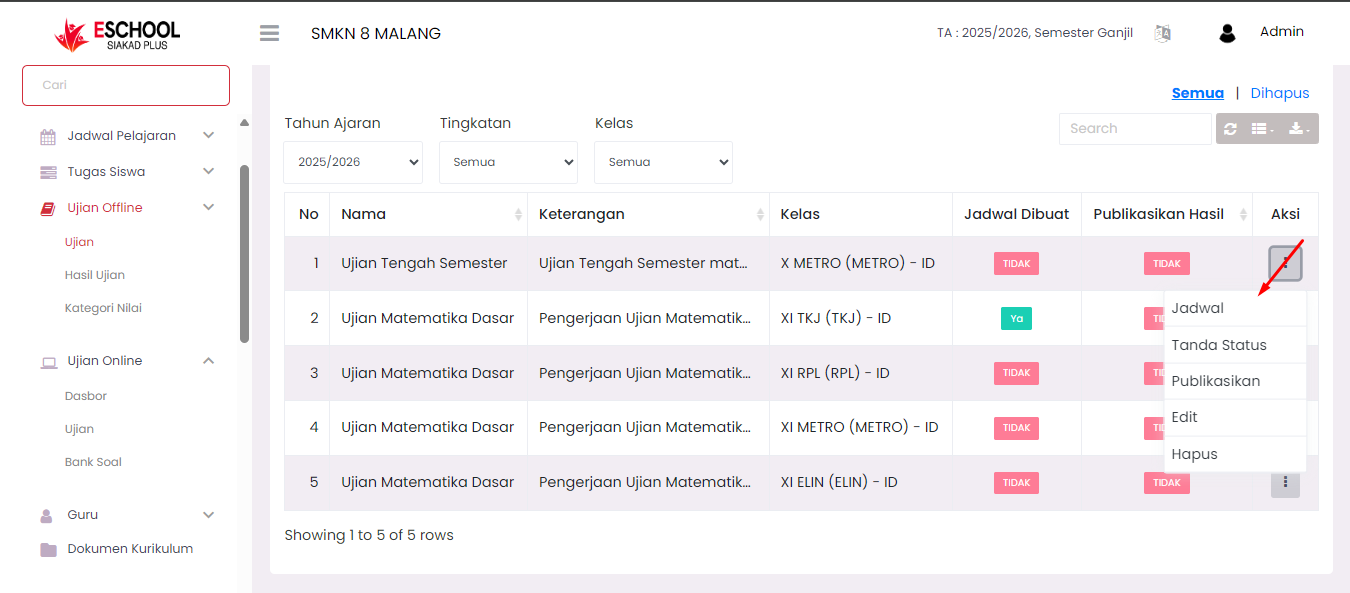
1. Access Offline Exams → Exams Menu
You will see the Exam List table containing all exams that have been created.
2. Click the Three-Dot Icon (⋮) in the Action Column
On the row of the exam you want to schedule, click the (⋮) icon to display action options.
3. Select the "Schedule" Menu
From the list of options that appear, select "Schedule" to enter the exam scheduling page.
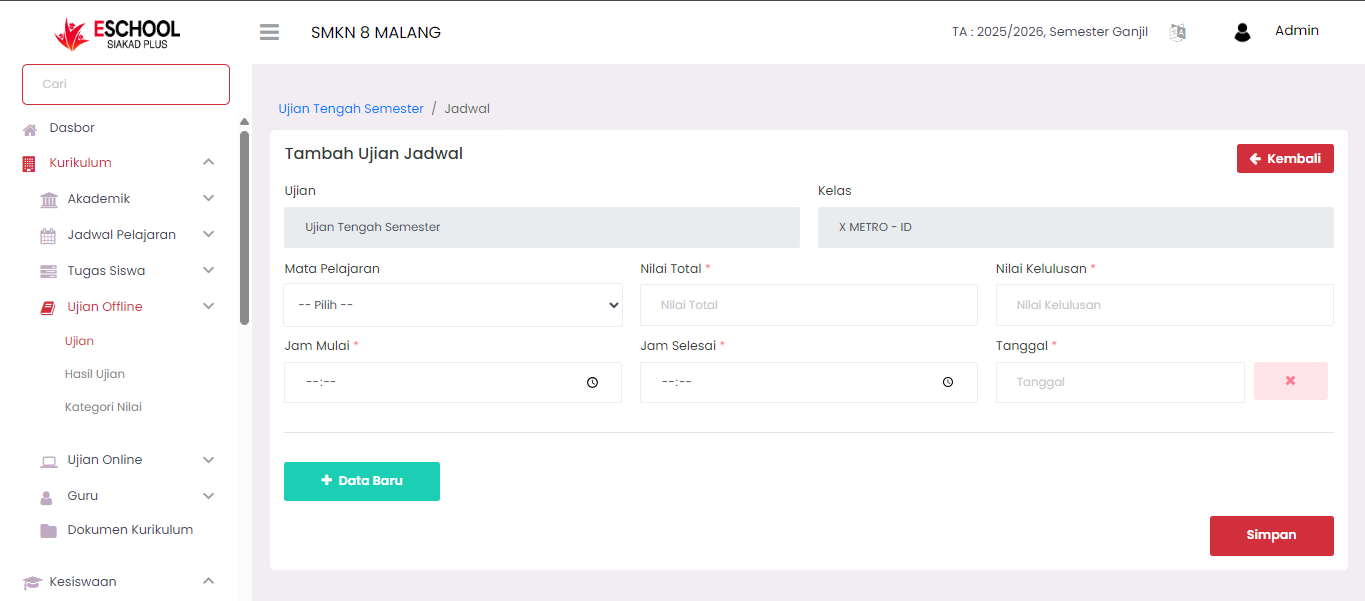
Exam Scheduling Form
After selecting the Schedule menu, the system will display the Add Exam Schedule page. On this page, you must complete the following data:
Exam
Name of the exam being scheduled (filled automatically).
Class
Class taking the exam (filled automatically).
Subject
Select the subject to be tested.
Total Score
Maximum score that can be obtained on the exam.
Passing Score
Minimum passing grade for the exam.
Start Time
Time when the exam implementation begins.
End Time
Time when the exam implementation ends.
Date
Date of exam implementation.
Important Note: All fields marked with * (must be filled) so that scheduling data can be saved properly in the system.
Saving Exam Schedule
After all fields are filled correctly:
- Click the "+ New Data" button to add the schedule to the list.
- Click the "Save" button to save the exam scheduling data permanently.
Exam Scheduling Results
- After the schedule is saved, the status in the Schedule Created column in the Exam List table will change to "Yes".
- Scheduled exams can only proceed to the result publication process after implementation is complete.
Process Flow Overview:
- Create an exam in the Offline Exams menu.
- Click the (⋮) icon → select Schedule to start scheduling.
- Fill in the scheduling form (subject, score, time, date).
- Save the exam schedule.
- The exam is ready to be implemented according to the determined schedule.
Need Further Assistance?
If you require additional support, please reach out to us via the eSchool Help Page.